How to Sing with Proper Vocal Placement: Finding Your Resonance
Let’s face it:
Most singers have no idea where their voice is supposed to “go” when they sing.
And I’m not talking about which notes to hit – I’m talking about vocal placement.
You know what I mean:
You’ve probably heard vocal coaches talk about “singing into the mask” or “placing your voice forward” or “finding your resonance.”
But what the heck does that actually mean?
And more importantly, how are you supposed to do it?
Here’s the problem:
Without proper vocal placement, your voice sounds weak, muffled, or strained – no matter how much you practice.
Just look at what happens when singers don’t understand vocal placement:
Their voice gets lost in the mix…
They sound nasal or throaty…
They struggle to project without shouting…

And worst of all, they develop bad habits that are hard to break!
But what if I told you that learning proper vocal placement could transform your voice overnight?
Sound too good to be true?
It’s not.
Today, I’m going to show you exactly how to sing with proper vocal placement so you can find your resonance and make your voice sound richer, clearer, and more powerful.
Ready to place your voice where it belongs?
Let’s dive in!
By the way, if you find videos more helpful in learning these topics, feel free to check out this video I shot a while back about placement:

What Is Vocal Placement Anyway?

Before we jump into the techniques, let’s make sure we understand what vocal placement actually means.
Vocal placement is where you feel the vibrations and resonance when you sing.
But here’s the thing:
Your voice doesn’t actually “go” anywhere.
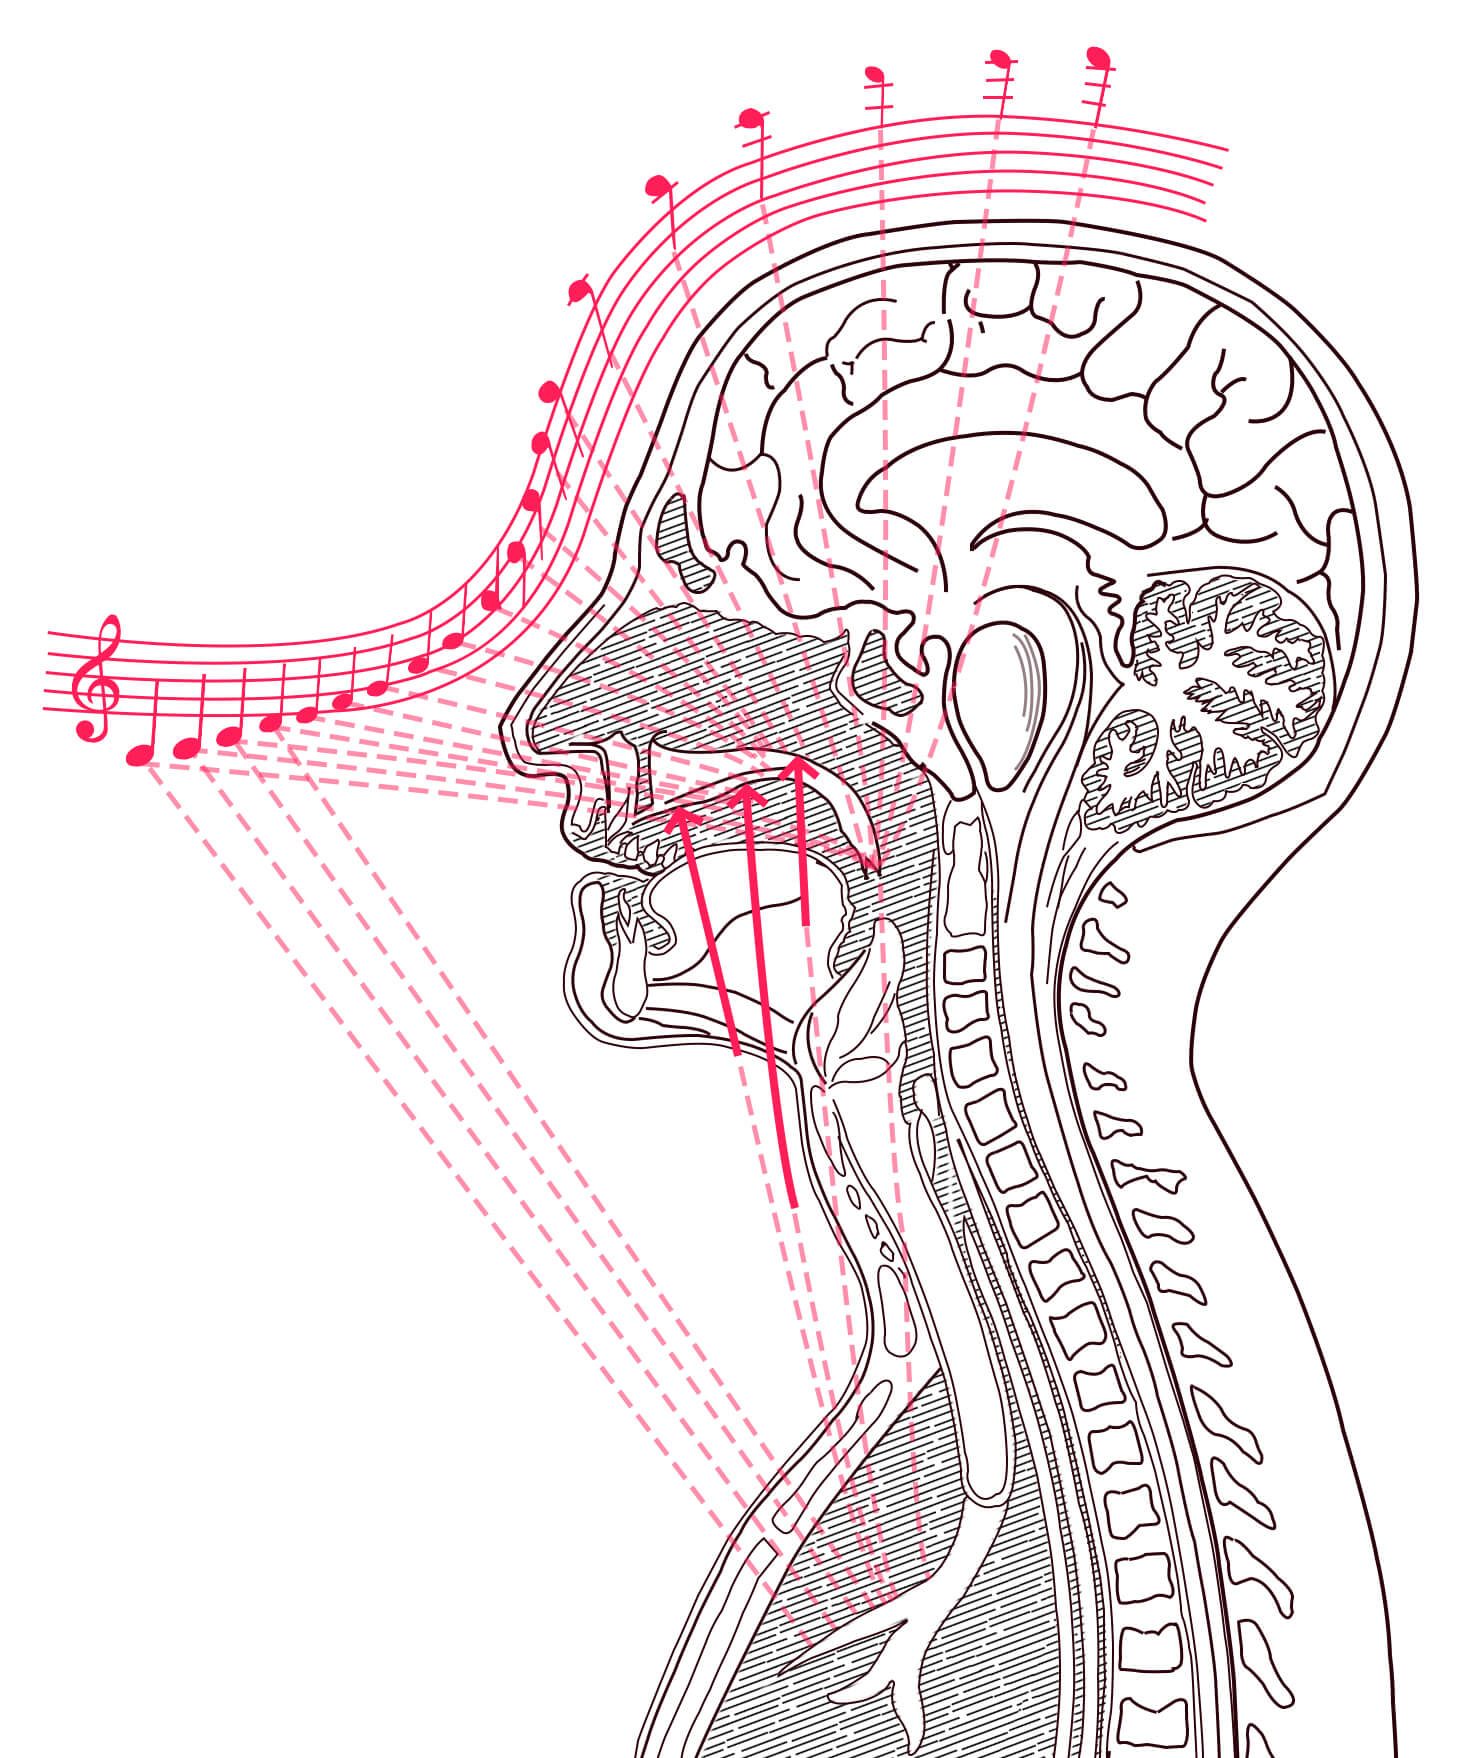
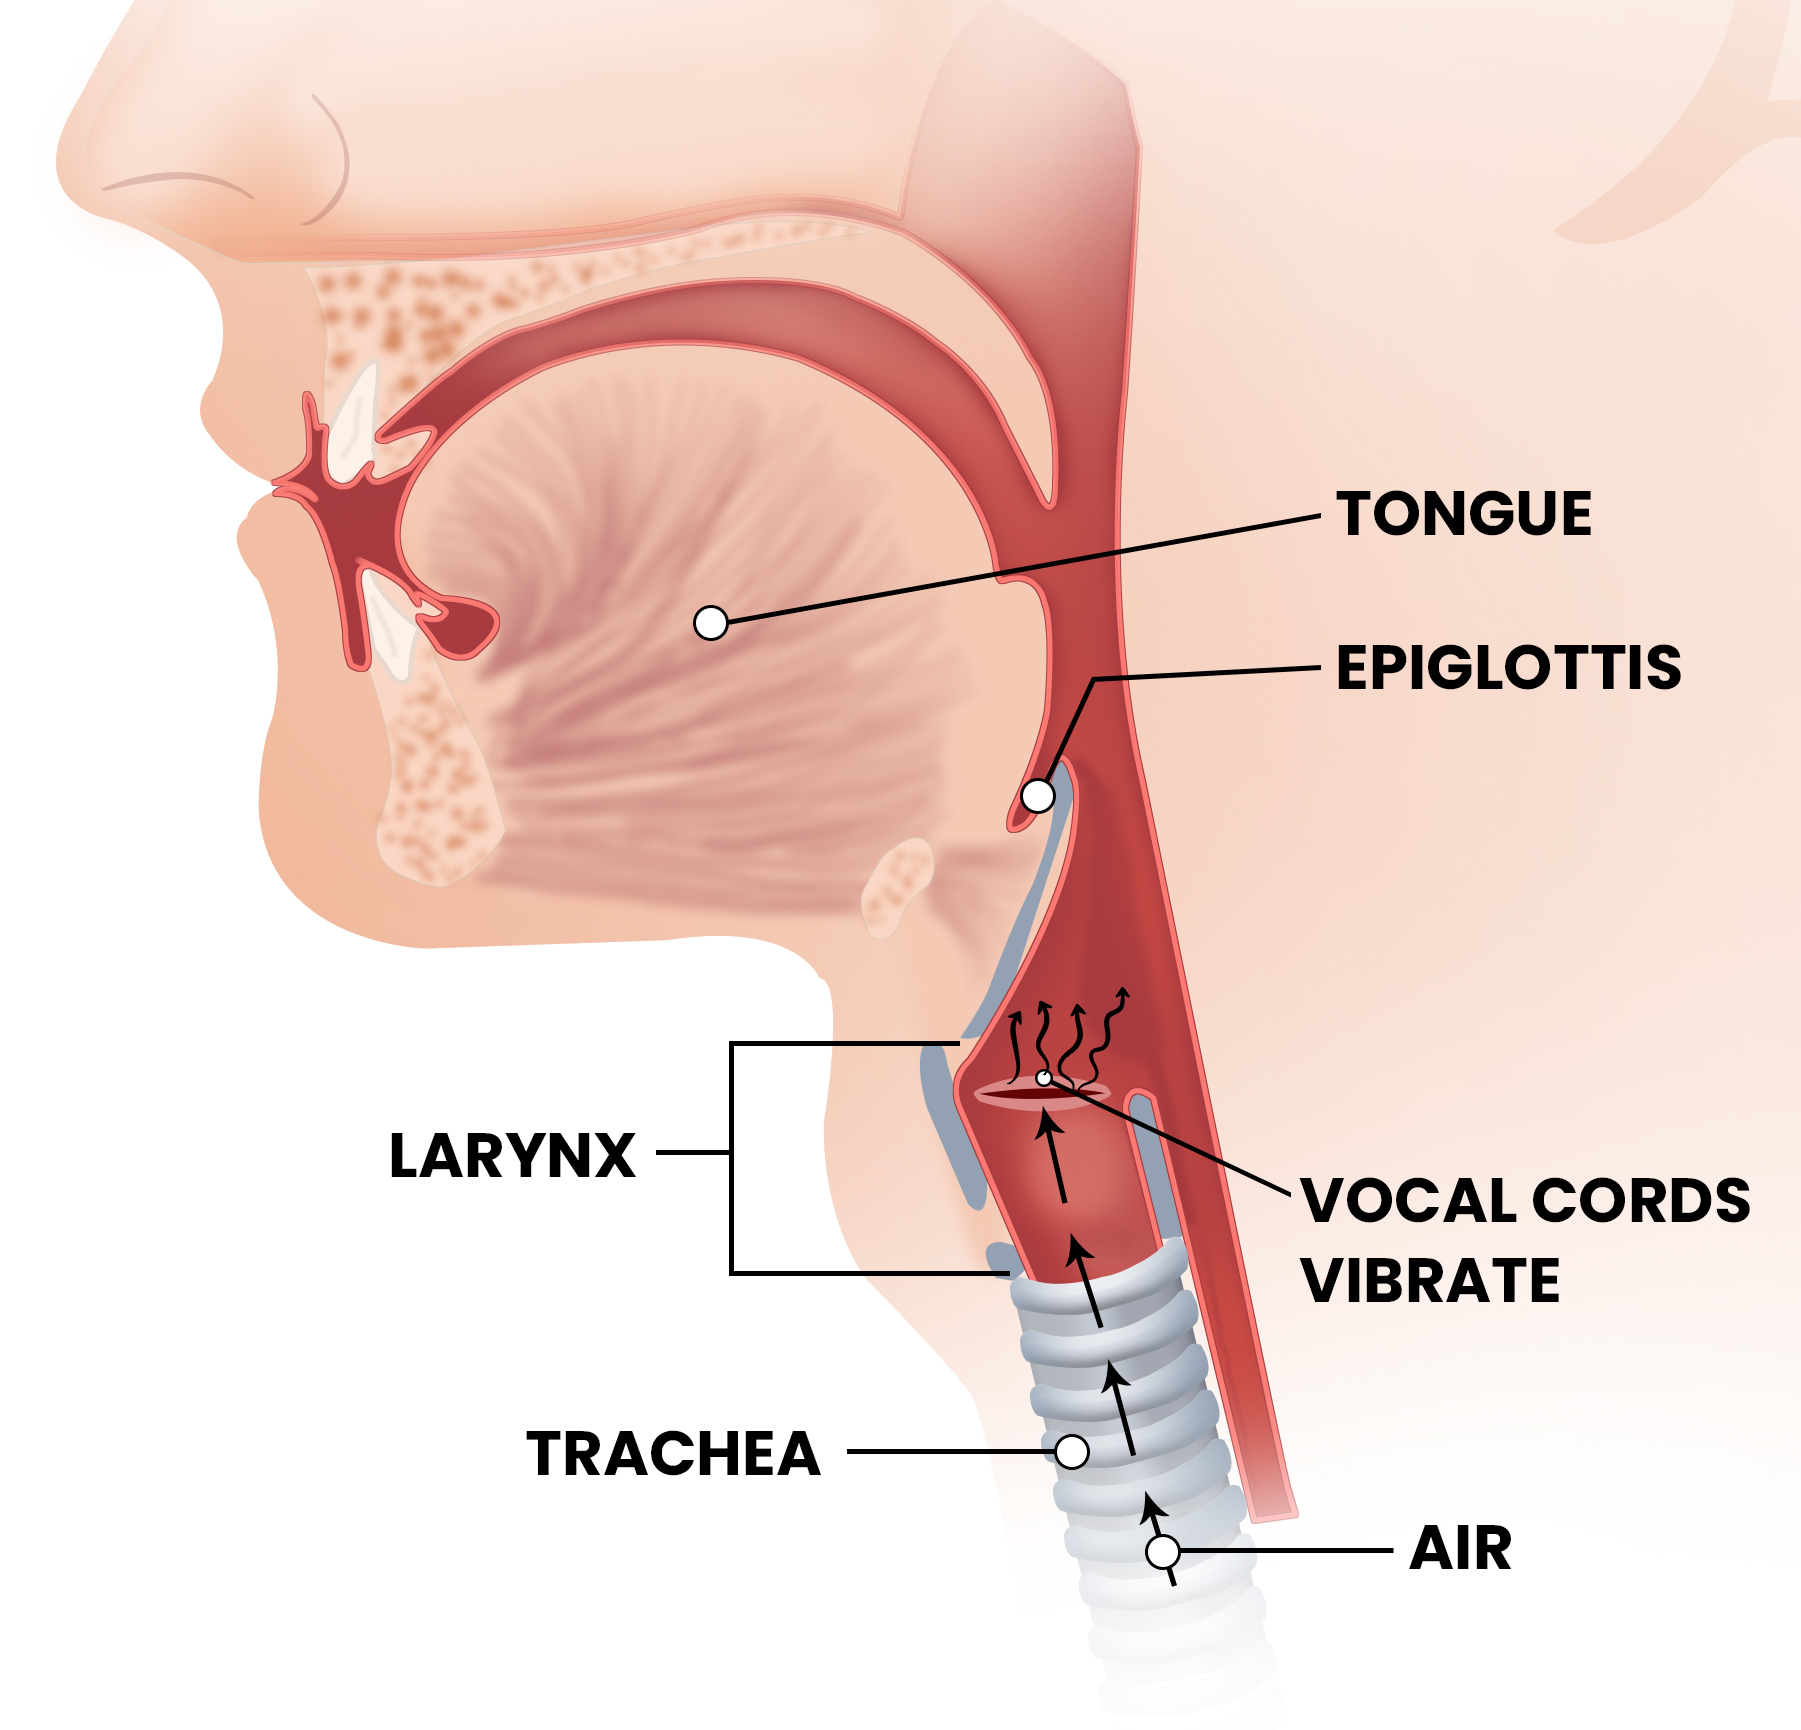
The sound is always created at your vocal folds.
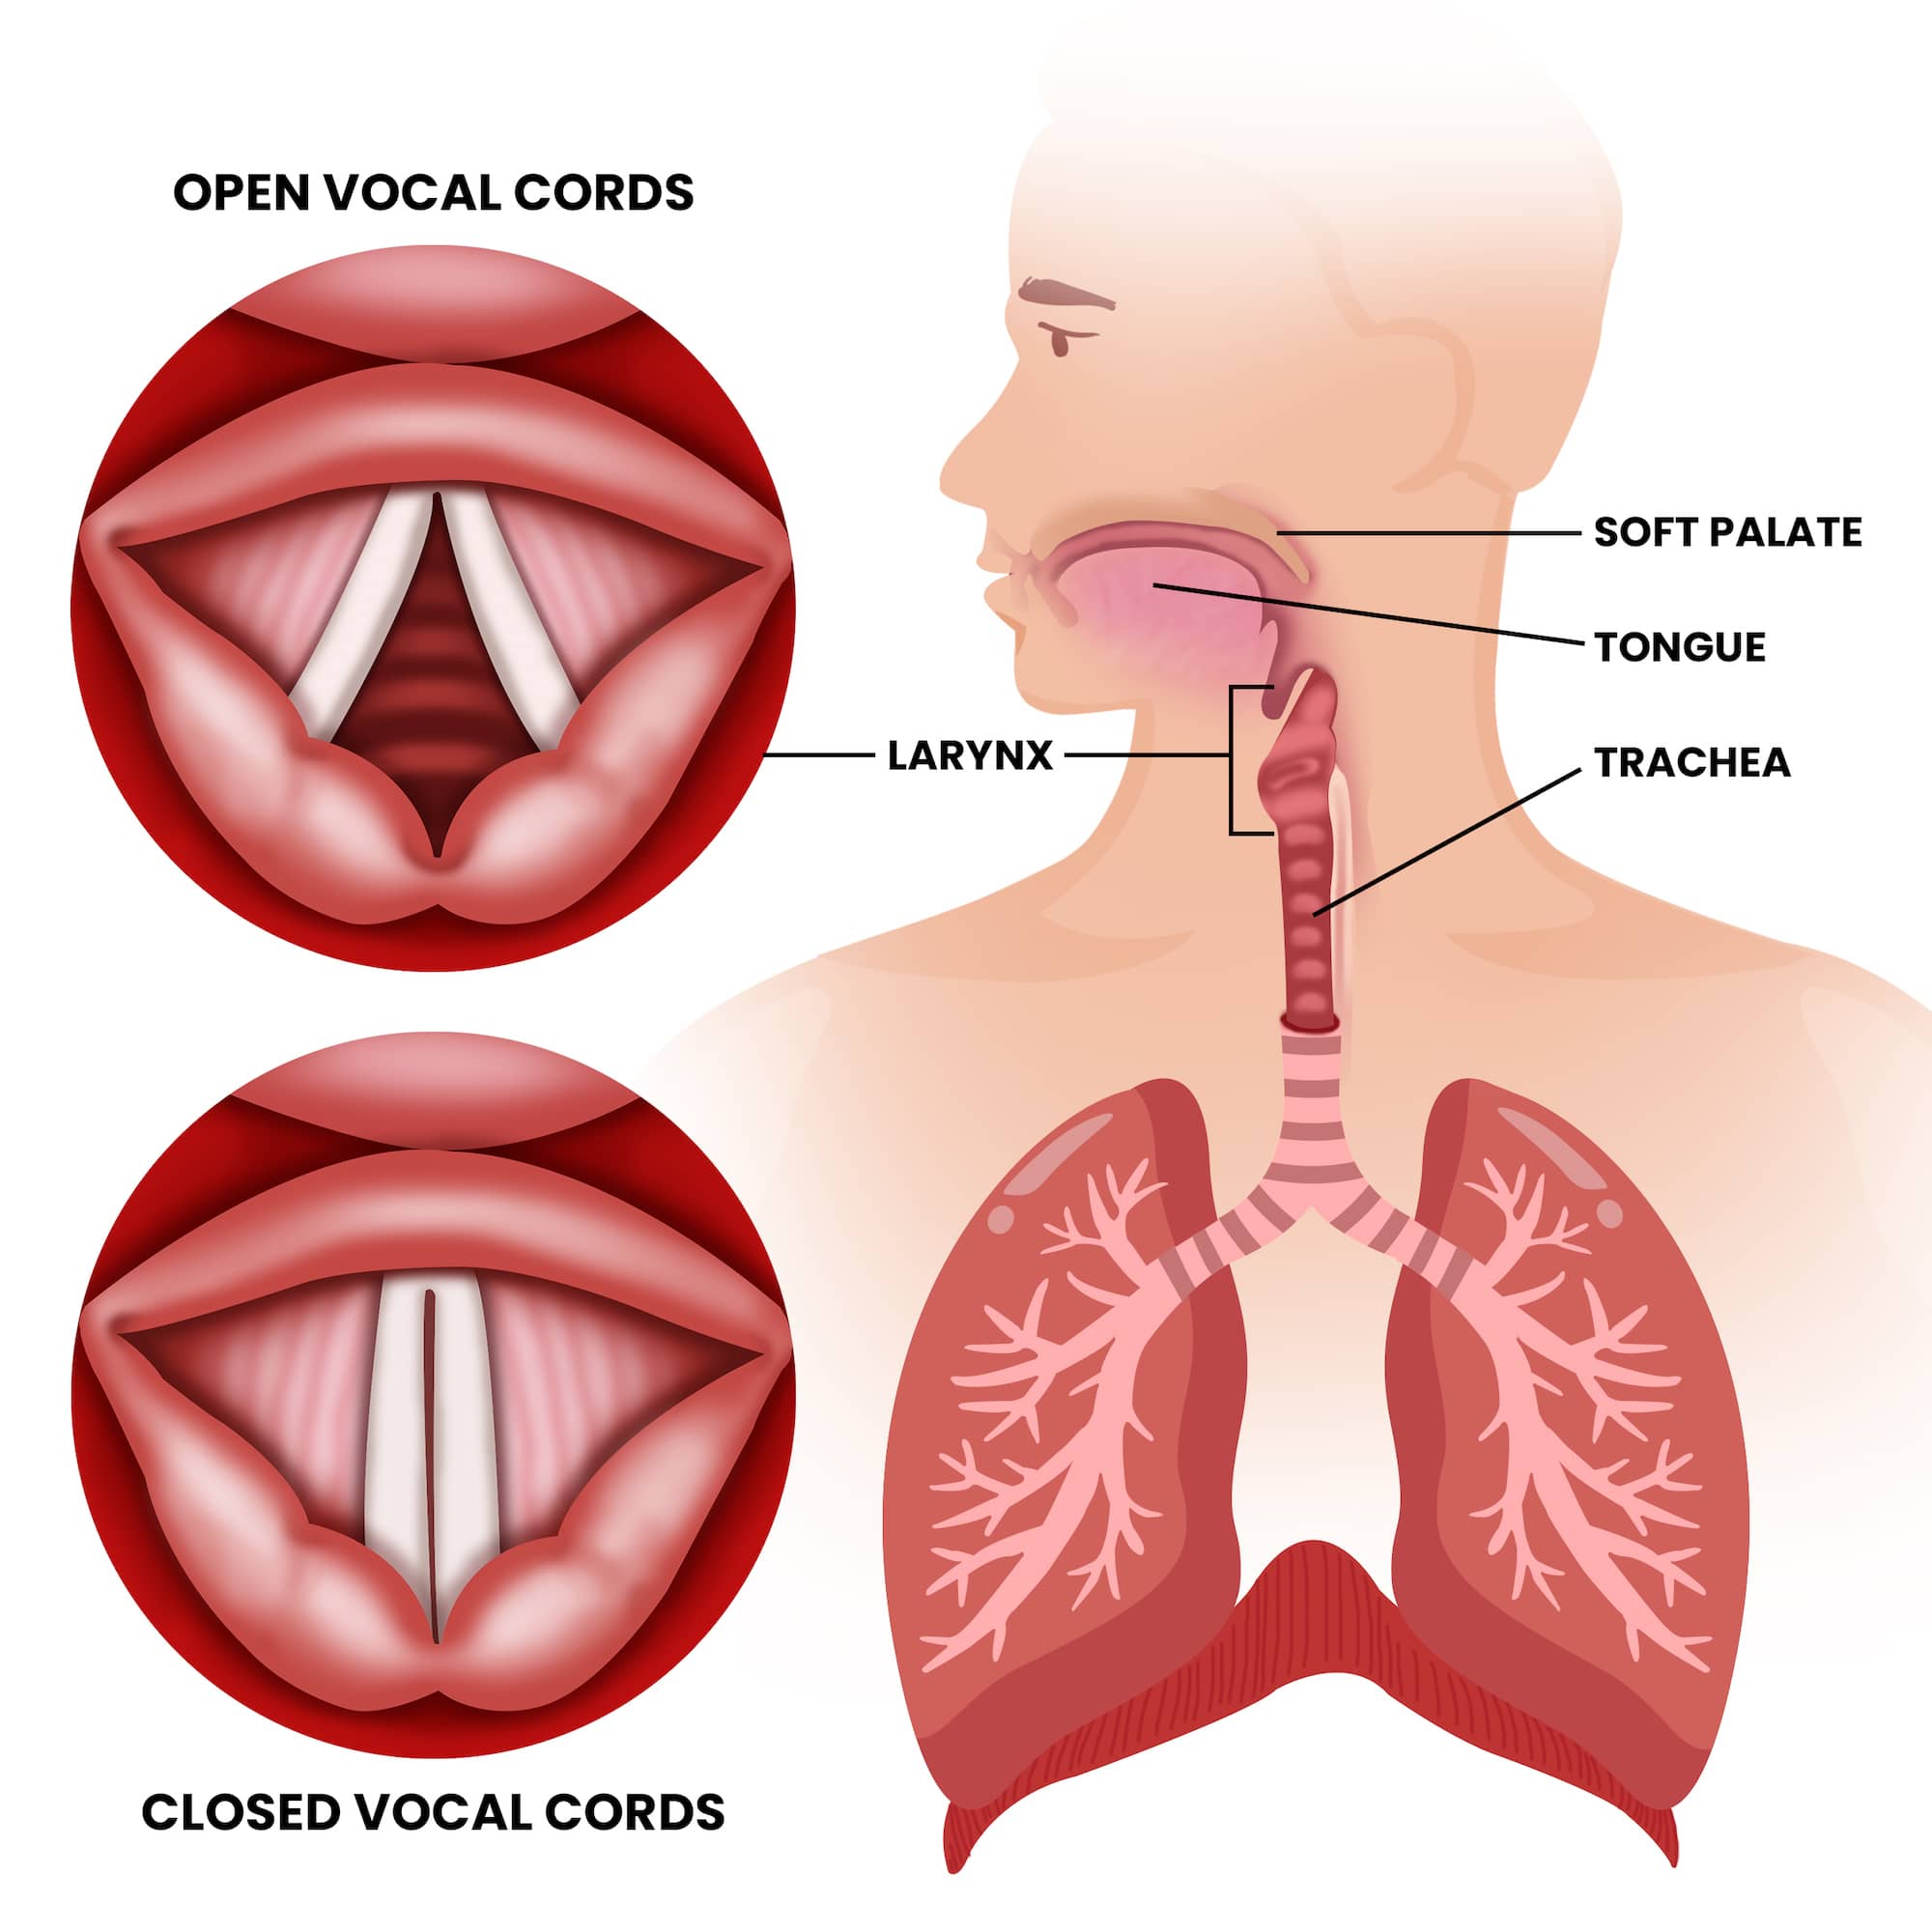
The vocal folds vibrate together, creating sound waves that bounce around in your vocal tract and out into the world to create (hopefully) beautiful singing!
And when the vibrations from your vocal folds are directed to different parts of your body (like too far into the nose in nasal singing, for example), proper placement is the key to fixing it.
So why do we talk about placement?
Because where you feel the resonance affects how your voice sounds to others.
Think of your vocal tract (the tube-like space from your vocal cords to your lips) like a musical instrument.
Just like a guitar or violin, the size and shape of the space inside the instrument changes the sound.

Likewise, where you place the guitar pick or violin bow on the instrument itself can create completely different sounds.
But when vocal coaches talk about placement, they’re really talking about:
- Resonance – Where you feel vibrations in your body
- Focus – How concentrated or spread out your sound feels
- Projection – How efficiently your voice carries to listeners
Now, unlike “traditional” voice teachers who are always telling you to “place the tone forward” or “sing into the mask”, I have a bit of a HOT TAKE when it comes to placement.
Here it is:
Good placement is the RESULT of good singing technique, not something you force.
What does that mean?
Instead of trying to manipulate where your voice “goes,” (into the mask, or placing it forward, for example) I use specific exercises that naturally create the correct placement.
When you sing with proper, optimal placement happens automatically!
That means that good vocal placement is the ultimate result of several factors – like vowel formation, projection, correct chest voice and head voice balance, and breath support.
But don’t let that scare you!
While coordinating your voice to find the correct placement sounds complicated, it’s actually REALLY simple in practice!
The goal is to find the sweet spot where your voice sounds its best and projects most efficiently—and then learn to recreate that feeling consistently.
Why Proper Voice Placement Matters…

Some singers wonder if vocal placement really makes that much difference.
The answer is absolutely YES!
There are a ton of benefits to proper voice placement like:
- Better Projection With correct placement, your voice carries further without straining or shouting.
- Richer Tone Quality Proper resonance gives your voice depth, warmth, and richness.
- Less Vocal Fatigue When your voice is properly placed, you can sing longer without getting tired.
- Improved Clarity Good placement helps your words cut through instrumental accompaniment.
- Professional Sound Trained singers all understand vocal placement—it’s what separates amateurs from pros.
Think about your favorite singers. Maybe Bruno Mars or Adele…
Bruno’s voice is bright, forward and beautifully “ringy”.

Adele’s voice on the other hand is a bit darker, belty and “woofy”.

Now, both of these singers have the perfect placement for their voices!
And since they’ve already mastered vocal technique, they’re just exploring different vocal tones (“brighter” and more “forward” for Bruno, while Adele’s tone is placed more “open” and “back”).
What makes their voices so captivating?
It’s not just their vocal range or singing power—it’s how effortlessly their voice seems to float and fill the space.
That’s proper vocal placement at work!
The 5 Most Common Vocal Placement Problems

Before we learn proper technique, let’s identify the most common placement problems.
You may be guilty of one or even more than one of these common vocal placement issues.
BTW, if you’re unsure whether your placement is correct or not, consider recording yourself and listen back!
If you hear one of the following issues in your vocal placement, you’re in the right place!
Problem #1: Singing Too Far “Back” In The Throat

What it sounds like: Muffled, dark, swallowed sound
What causes it: The larynx being too low, or the tongue being pulled back
How it feels: Like you have a TON of space in the back of your throat or that your voice is stuck in your throat
Problem #2: Nasal Singing
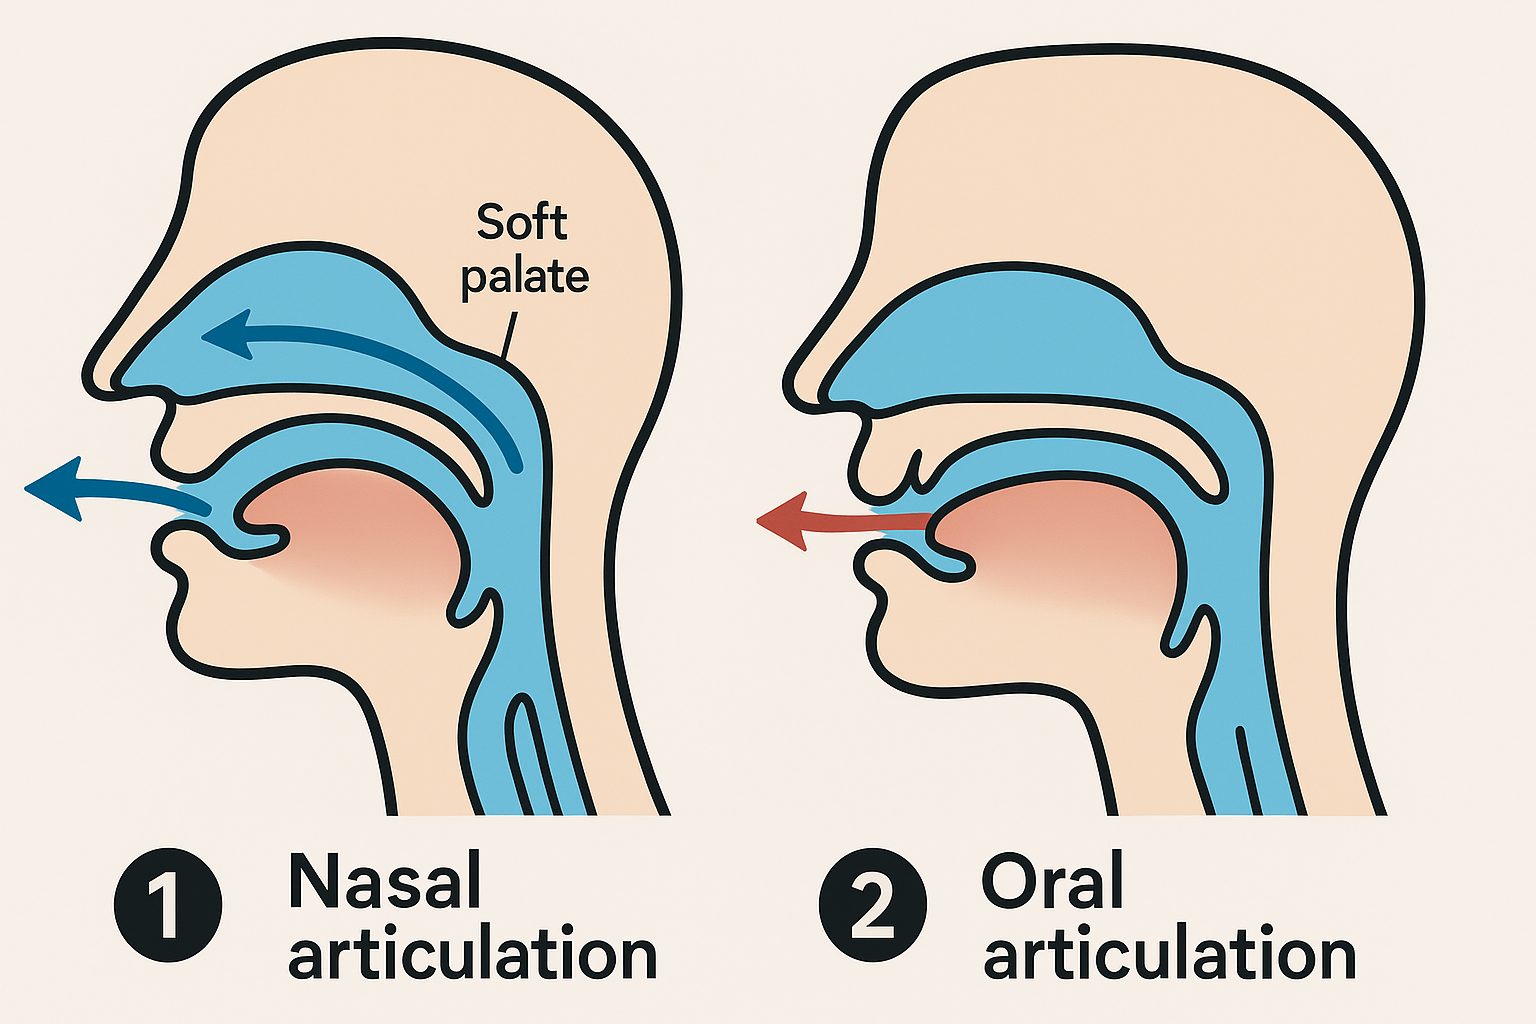
What it sounds like: Whiny, nasal, like talking through your nose
What causes it: The soft palate being lowered, allowing too much sound to resonate in the nasal cavity
How it feels: Vibrations concentrated in your nose
Problem #3: Breathy Singing

What it sounds like: Airy, weak, lacks focus
What causes it: Vocal folds not closing completely leading to poor breath support
How it feels: Like your voice has no center or core
Problem #4: Strained Singing

What it sounds like: Tight, forced, or a bit like “Kermit” the frog
What causes it: Muscle tension, the larynx being too high, or the tongue raising too much for the phrase being sung
How it feels: Like your throat is tight or even a bit “strangled”
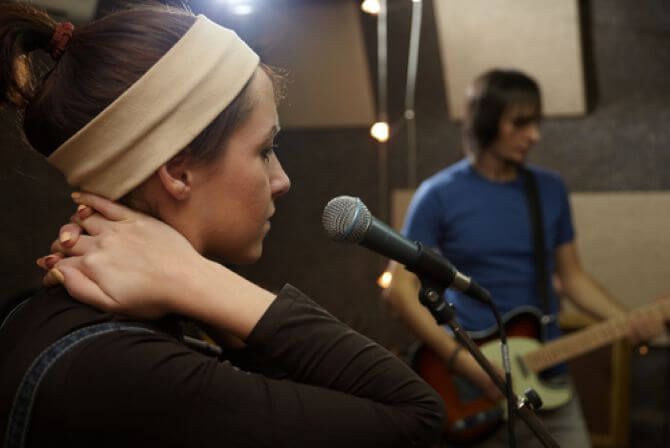
Problem #5: Lost in the Mix

What it sounds like: Voice disappears when singing with music
What causes it: Poor projection, unfocused resonance, lack of vocal fold closure
How it feels: Like you’re singing loudly but no one can hear you
(Please note: This is not to be confused with Mixed Voice, the blending of the chest voice and head voice. Instead, here “mix” refers to losing the sound of the singer in the overall environment.)
Whew, that was a lot of things that could go wrong!
Do any of these issues sound familiar?
If so, don’t worry—every singer deals with placement issues at some point.

Want to Nail Those High Notes?
Every singer wants to expand their range. Expand Your Range Fast will show you how to finally hit high notes in your voice without straining. Expand your range by 5 notes or more!
The good news is that with the right techniques, you can fix these problems!
To learn how, read on…
The Science Behind Singing Resonance Technique
Let’s get nerdy for a minute (but I promise to keep it simple!).
Your voice has several resonating spaces:
- Throat (pharynx) – Affects tone color and vowel clarity
- Mouth cavity – Shapes vowels and affects brightness
- Nasal cavity – Adds ring and projection when used correctly
- Sinuses – Contributes to the “ringy” sound some singers have
The key to proper vocal placement is learning to balance these resonating spaces so they work together instead of fighting each other.
When everything is coordinated properly, your placement lines up perfectly, your breath is supported and you can project with tons of power effortlessly.
How to Find Your Proper Voice Placement: 5 Essential Steps

Now that we’ve discussed what vocal placement actually is and the most common issues, let’s start to develop the right placement for you voice!
Ready?
Just follow these five steps…
Step #1: Establish Your Foundation with “Tall Posture”
Before working on placement, you need proper posture and breathing.
How to do it:
- Stand up with your feet hip-width apart
- Your feet, hips and shoulders should all be generally aligned
- Keep your chest “proud” or “tall” where you’re not slouching
- Allow the shoulder to relax back, where they’re not too high or pushed forward in a slouched position
- Keep this aligned posture throughout your practice
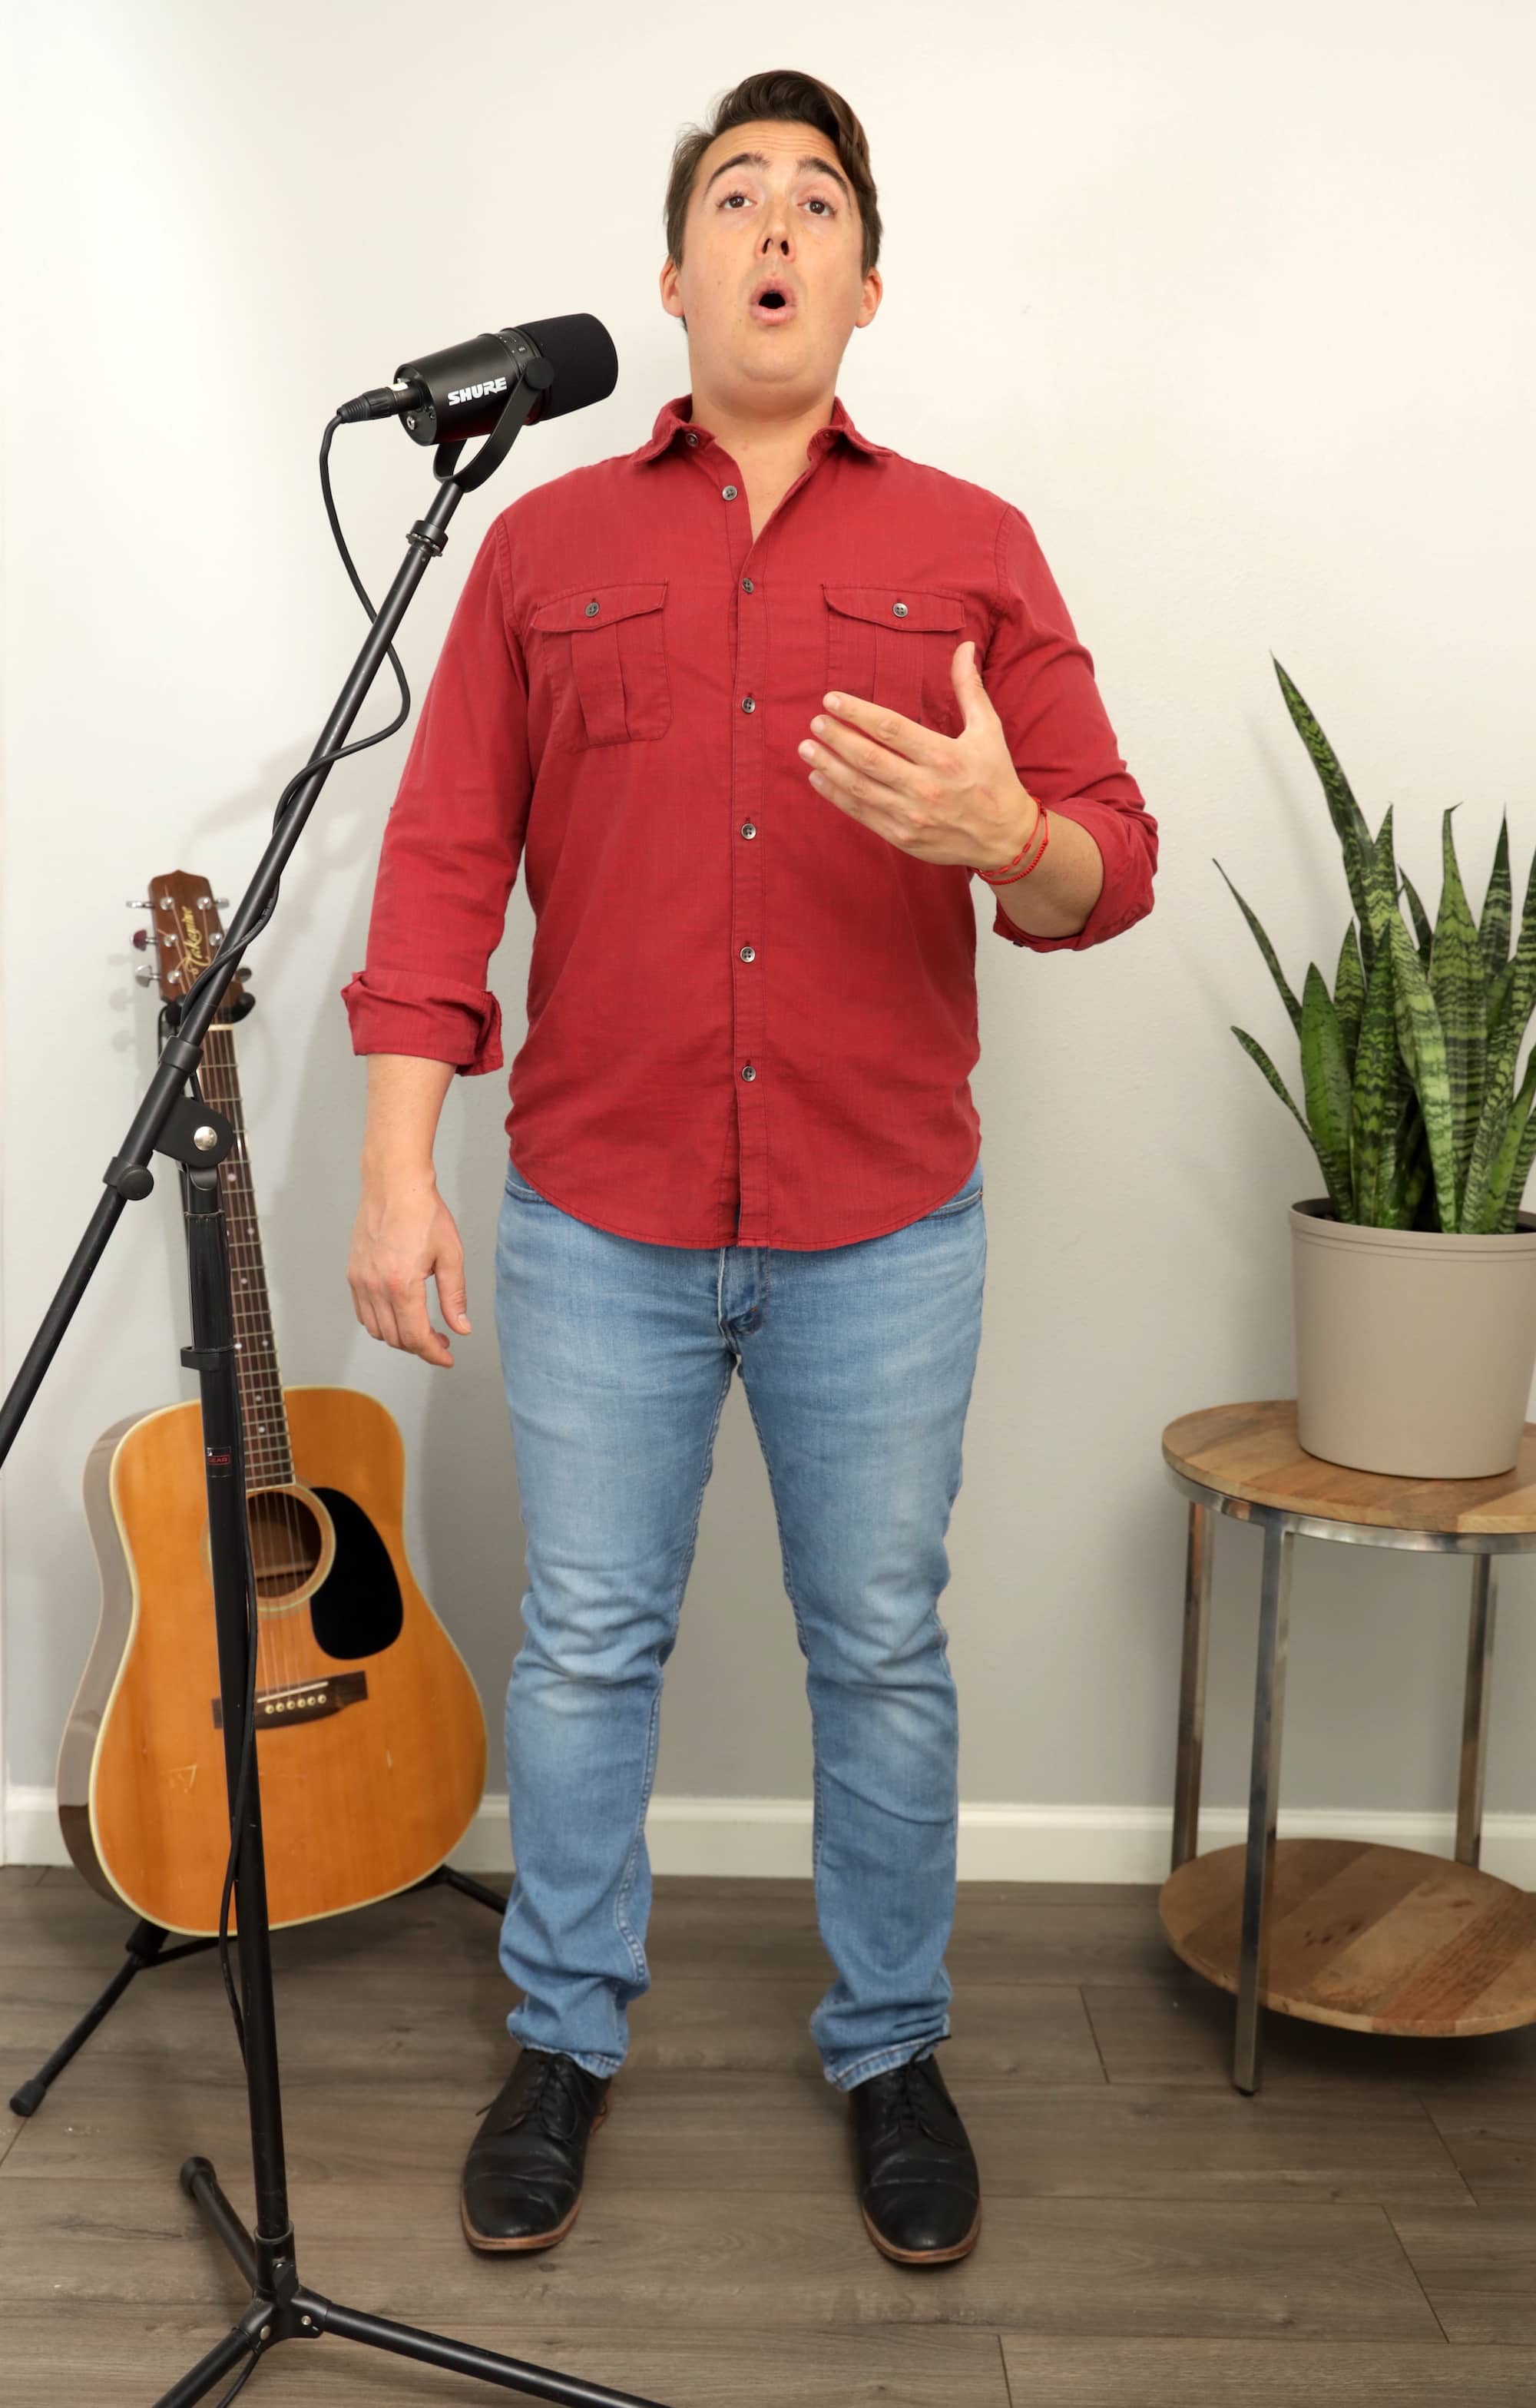
Why it matters: Poor posture creates tension that interferes with resonance. You can’t have good placement without good alignment.
Think about the stereotypical singer/songwriter slouching over his guitar at the local coffee shop. Odds are his voice is probably tight and strained. That’s because his posture isn’t allowing the tone to be placed correctly.
Pro tip: Practice in front of a mirror to check your posture. Many singers think they’re standing tall when they’re actually collapsing somewhere.
Step #2: Sing with Good Breath Support
Breath is the fuel for singing. Without good breathing for singing, your your placement will be shallow and strained.
How to do it:
- Stand with “tall posture” found in the last exercise
- Next, place your hands around both sides of your belly (as if you’re pregnant and feeling the baby)
- With your hands in this position, inhale so that your stomach pushes your hands out
- Make sure that you’re not raising your chest or shoulders, and that you’re not pulling your stomach inward. The only movement should be in your low belly.
- With your hands still in position, sing a phrase and feel that your stomach comes back in as the breath slowly leaves your mouth.
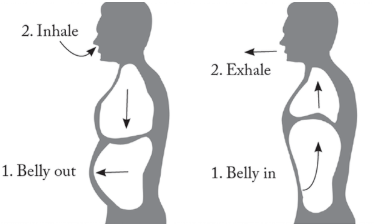
Why it matters: I have been AMAZED at how just improving the breath support for a singer can enhance their vocal placement. With the proper “low belly breath”, you’ll find the you can place the tone so much more easily.
Pro tip: Make sure that your chest and shoulders are not rising as you inhale. The only movement should be in your low belly.
Step #3: Apply the “5-Tone Count”
Now that you’re singing with the proper posture and breath support, let’s try our first singing exercise.
In this exercise, you’re going to apply the same feeling of your speaking voice TO your singing voice – creating the perfect placement for contemporary singing.
How to do it:
- Start by saying the words “One – Two – Three – Four – Five” out loud.
- As you say the words, project them like you’re trying to reach someone on the other side of the house from you, but WITHOUT yelling or whispering.
- Next, say the words “One” through “Five” and back down to “One”.
- Finally, “speak-sing” the words “One” through “Five” and back down on a 5-Tone scale (following the first five notes of the major scale) – keeping the tone projected and strong.

Why it matters: For most popular music genres, the correct singing placement is the same as your natural speech placement. This approach eliminates the guesswork and creates consistent, natural-sounding placement.
Pro tip: If a vowel sounds too dark or muffled when you sing it, you’re probably changing it from how you’d speak it. Go back to clear speech and gradually add pitch.
Here’s a quick clip of me performing the “5-Tone Count”:

Step #4: Practice the “Nae” Placement Exercise
This exercise helps you find forward placement naturally through proper vowel formation.
How to do it:
- Say “Nae” (as in “nasty”) in a bright, open way
- Notice how the open “ae” vowel naturally brings the sound forward
- The “N” consonant helps direct resonance toward your face
- Now sing the “Nae-Nae-Nae-Nae-Nae” on the 5-tone scale from step #3 – maintaining the same forward placement.
Same scale as last time:
Why it matters: The combination of the “N” consonant and open “ae” vowel naturally creates forward resonance without you having to force or manipulate anything. The placement happens as a result of correct vowel formation.
Pro tip: Don’t try to “place” the sound anywhere—just focus on clearly enunciating the “Nae” and let the forward placement happen naturally. If it sounds too nasal, you’re probably overdoing it.
Here’s a quick clip of me performing the “5-Tone Nae”:

Step #5: Master the “Mum” Resonance Builder
This exercise teaches you to maintain forward placement on a more “relaxed” vowel.
The “Nae” from the previous exercise is excellent for discovering a forward placement, but in the case of the “Mum” exercise, the vowel (“uh”) will be the same as the voice at rest.
How to do it:
- Say “Mum” (as in “mother”) in a projected, relaxed way – remember, you don’t want to shout or whisper it
- Notice how the open “Uh” vowel is naturally very relaxed in the throat.
- The “M” consonant helps direct resonance toward your face and lips
- Now sing the “Mum-Mum-Mum-Mum-Mum” on the 5-tone scale from step #3 – maintaining the same forward placement.
Again, we’re going to perform it on the same scale:
Why it matters: It’s important to learn the ability to keep the tone in a relaxed way (which the “uh” vowel helps) while still keeping it placed forward.
Pro tip: If the “Mum” feels throaty or “back”, go back to the “Nae” and make sure you’re really feeling face vibrations before opening.
Here’s a quick video of me demonstrating the “Mum” exercise:

Advanced Vocal Placement Techniques

Once you’ve mastered the basics, try recording yourself again.
You may notice that you’re still struggling with the tone being too nasal or even strained.
If that’s the case, try these advanced placement techniques to correct it:
The “Buh” Exercise for Nasal Correction
If you’re sounding too nasal, this exercise naturally raises your soft palate without you having to think about it.
How to do it:
- Say “Buh” (as in “bubble”) with clear articulation
- Notice how the “B” consonant naturally engages your soft palate
- Now sing “Buh-Buh-Buh-Buh-Buh” on a 5-tone scale
- Pay attention to how the tone feels different from nasal singing
- Once you feel the change, notice where you sense the resonance in your body
Why it works: The “B” consonant automatically raises your soft palate, which reduces nasal resonance. Rather than telling you to “place your voice” somewhere, this exercise creates the right coordination naturally.
My teaching approach: After you do the exercise, where do you feel the new resonance? Learn to recognize good placement through cause and effect, rather than manipulation.
The “Dopey Gug” Exercise for Balanced Placement
When your voice sounds too bright or strained, this exercise helps balance your placement naturally.
How to do it:
- Think of Dopey from Snow White and say “Gug” (as in “gutter”) in that relaxed, dopey way
- The sound should feel deep and open, like a yawn, not tight or overly bright
- Now sing “Gug-Gug-Gug-Gug-Gug” on a 5-tone scale
- Notice how this naturally relaxes your larynx and throat
- Pay attention to where you feel the resonance after doing this exercise
Why it works: This exercise prevents excessive brightness by relaxing the larynx while maintaining good vocal fold closure. The “G” consonant engages your vocal folds properly, while the dopey quality relaxes tension that can make placement too forward or strained.
My teaching approach: Rather than telling you to “place your voice back,” this exercise creates the right balance through proper vocal coordination.
The Mirror Placement Check
Visual feedback can help you identify placement issues.
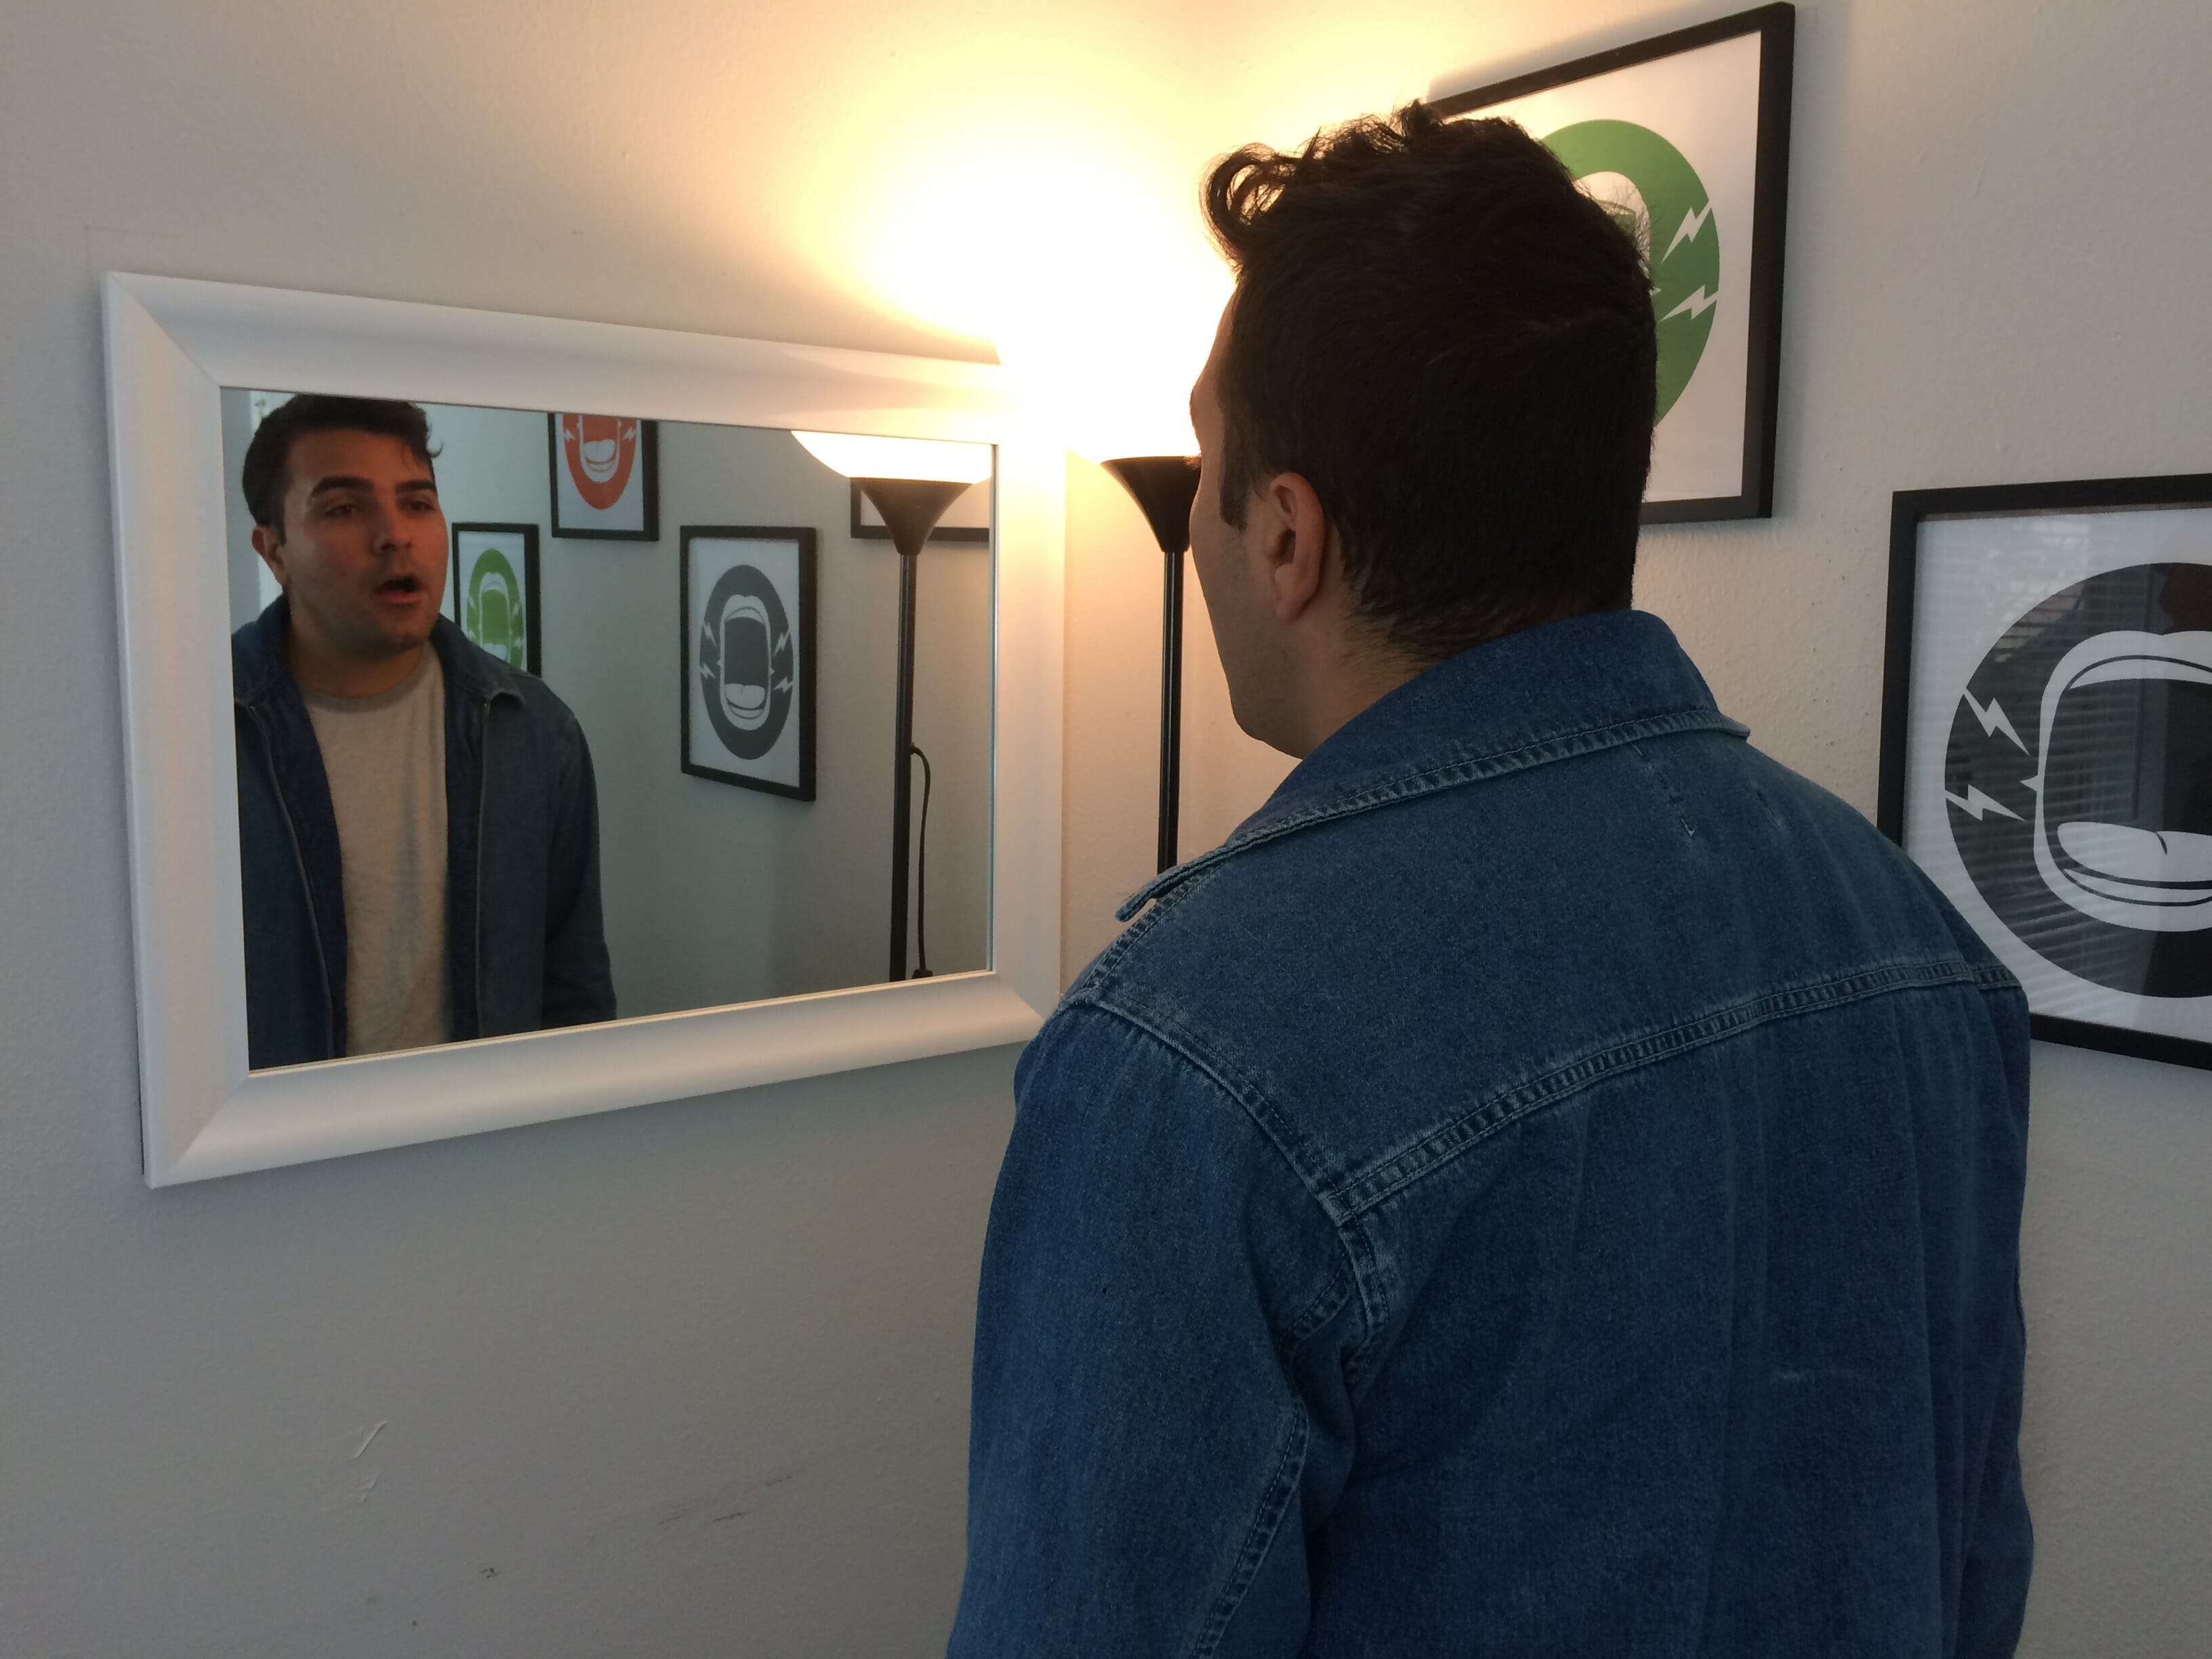
How to do it:
- Stand in front of a mirror while practicing
- Watch for signs of tension (raised eyebrows, keeping the jaw too tight, or raising your shoulders)
- Notice if your throat area looks strained or tight
- Practice maintaining a relaxed, neutral expression while singing. I call this the “dead man’s stare” because if you’re doing it right, you will not see your overall expression change even as you sing different words or notes.
- The goal is to look comfortable and natural, even on challenging notes
Why it helps: Many placement problems show up as visible tension that you can learn to recognize and eliminate.
How to Practice Singing Resonance for Different Styles

Let’s face it:
Different styles of music call for different vocal placement.
For example, a lot of what makes opera sound different from rock n’ roll can be traced back to placement.
Opera is darker, deeper and more “back”, whereas rock is typically placed more “forward” or even nasal.
That’s why different musical styles often favor slightly different placement approaches.
Here are some handy guidelines:
For Pop and Contemporary
- Focus on clear, bright placement that cuts through modern production
- Emphasize the “mask” area (face resonance) for clarity
- Keep the sound relatively forward and focused
For Classical and Opera
- Develop rich, complex resonance using all resonating spaces
- Balance forward placement with deeper resonance chambers
- Aim for a sound that can fill large spaces without amplification
For Musical Theater
- Prioritize text clarity through precise placement
- Use bright, forward placement for emotional expression
- Develop the ability to project over orchestras
For Rock and Blues
- Combine forward placement with chest resonance for power
- Allow for some edge and grit while maintaining core placement
- Focus on projection and emotional intensity
For Jazz and R&B
- Develop smooth, flowing placement that allows for stylistic flexibility
- Balance warmth (chest resonance) with clarity (forward placement)
- Practice placement that supports complex rhythmic phrasing
Common Questions About Vocal Placement
How Long Does It Take to Develop Good Vocal Placement?
If you’re working with a vocal coach, you should notice some improvement within the first few practice sessions. However, developing consistent, automatic proper placement typically takes 2-3 months of regular practice.
The key is adding placement into your daily vocal practice—even 10 minutes a day is better than longer, infrequent sessions.
Can You Have Too Much Forward Placement?
Yes! Excessive forward placement can create a nasal, unpleasant sound. The goal is balanced resonance that uses multiple resonating spaces appropriately.
Here’s my approach: If you sound too nasal, try the “Buh” exercise (the “B” consonant naturally raises your soft palate) listed earlier. Once you feel the tonal change, then we identify where that new, better placement feels in your body.
This cause-and-effect approach helps you find the right balance without forcing or manipulating your voice.
Does Vocal Placement Change for High Notes vs. Low Notes?
Yes – but you don’t want to “force” the tone anywhere necessarily.
Generally, the core principles of placement remain the same, but the balance shifts naturally:
- Low notes: More chest resonance occurs naturally with proper chest/head voice coordination
- High notes: Forward placement becomes more prominent when you have the right vocal register balance
- Middle notes: Speech-level vowel formation typically creates optimal placement automatically
The key is that when you have proper vocal technique (correct register balance, good vowel formation), the placement adjusts appropriately without you having to think about it.
Should I Feel Vibrations in My Chest When Singing?
For lower notes, yes! Chest resonance is part of proper placement for your lower register. However, you should still maintain some forward buzz even on low notes.
For higher notes, chest vibrations often diminish naturally as upper resonance spaces become more active.
Is Vocal Placement the Same as “Singing into the Mask”?
“Singing into the mask” refers specifically to forward facial resonance—it’s one aspect of vocal placement. Complete vocal placement involves balancing all your resonating spaces, not just the facial area.
Think of mask placement as an important part of the overall placement picture.
The Bottom Line on Vocal Placement
Here’s the truth:
Proper vocal placement is what separates singers who sound professional from those who sound amateur.
It’s not about having a “perfect” voice—it’s about making the most of the voice you have.
With proper vocal placement, you’ll:
- Project effortlessly without straining
- Develop a richer, more complex tone
- Sing with less fatigue and more endurance
- Cut through instrumental accompaniment
- Sound more polished and professional
Most importantly, be patient—developing automatic good placement takes time
Don’t get discouraged if some of these exercises feel weird at first. Every professional singer has worked on vocal placement, and it always feels strange when you’re learning something new.
The singers you admire didn’t just stumble onto great vocal placement—they developed it through practice, just like you’re doing now.
Ready to transform your voice with proper vocal placement?
Consider checking out my complete singing course Master Your Voice. It’s the only singing course which combines personal feedback from me with a proven system of exercises to improve your singing.
Want to Nail Those High Notes?
Every singer wants to expand their range. Expand Your Range Fast will show you how to finally hit high notes in your voice without straining. Expand your range by 5 notes or more!


2 Comments
This has been one of the most informative articles I’ve read since I decided to learn how to sing. I started my journey on August 8th 2025. As i do my exercises 5 days a week, twice a day. I can say i struggle with all 5 of these vocal placement problems this article covers. Matt has really went out of his was to help solve singers problems. And i can say,with the exercises he’s given in this article. I cannot wait to employ them in my daily Routine. I will be booking a lesson in the future. I’m hoping to get a head Start on my vocals before booking.
That’s awesome! Best of luck in your journey!